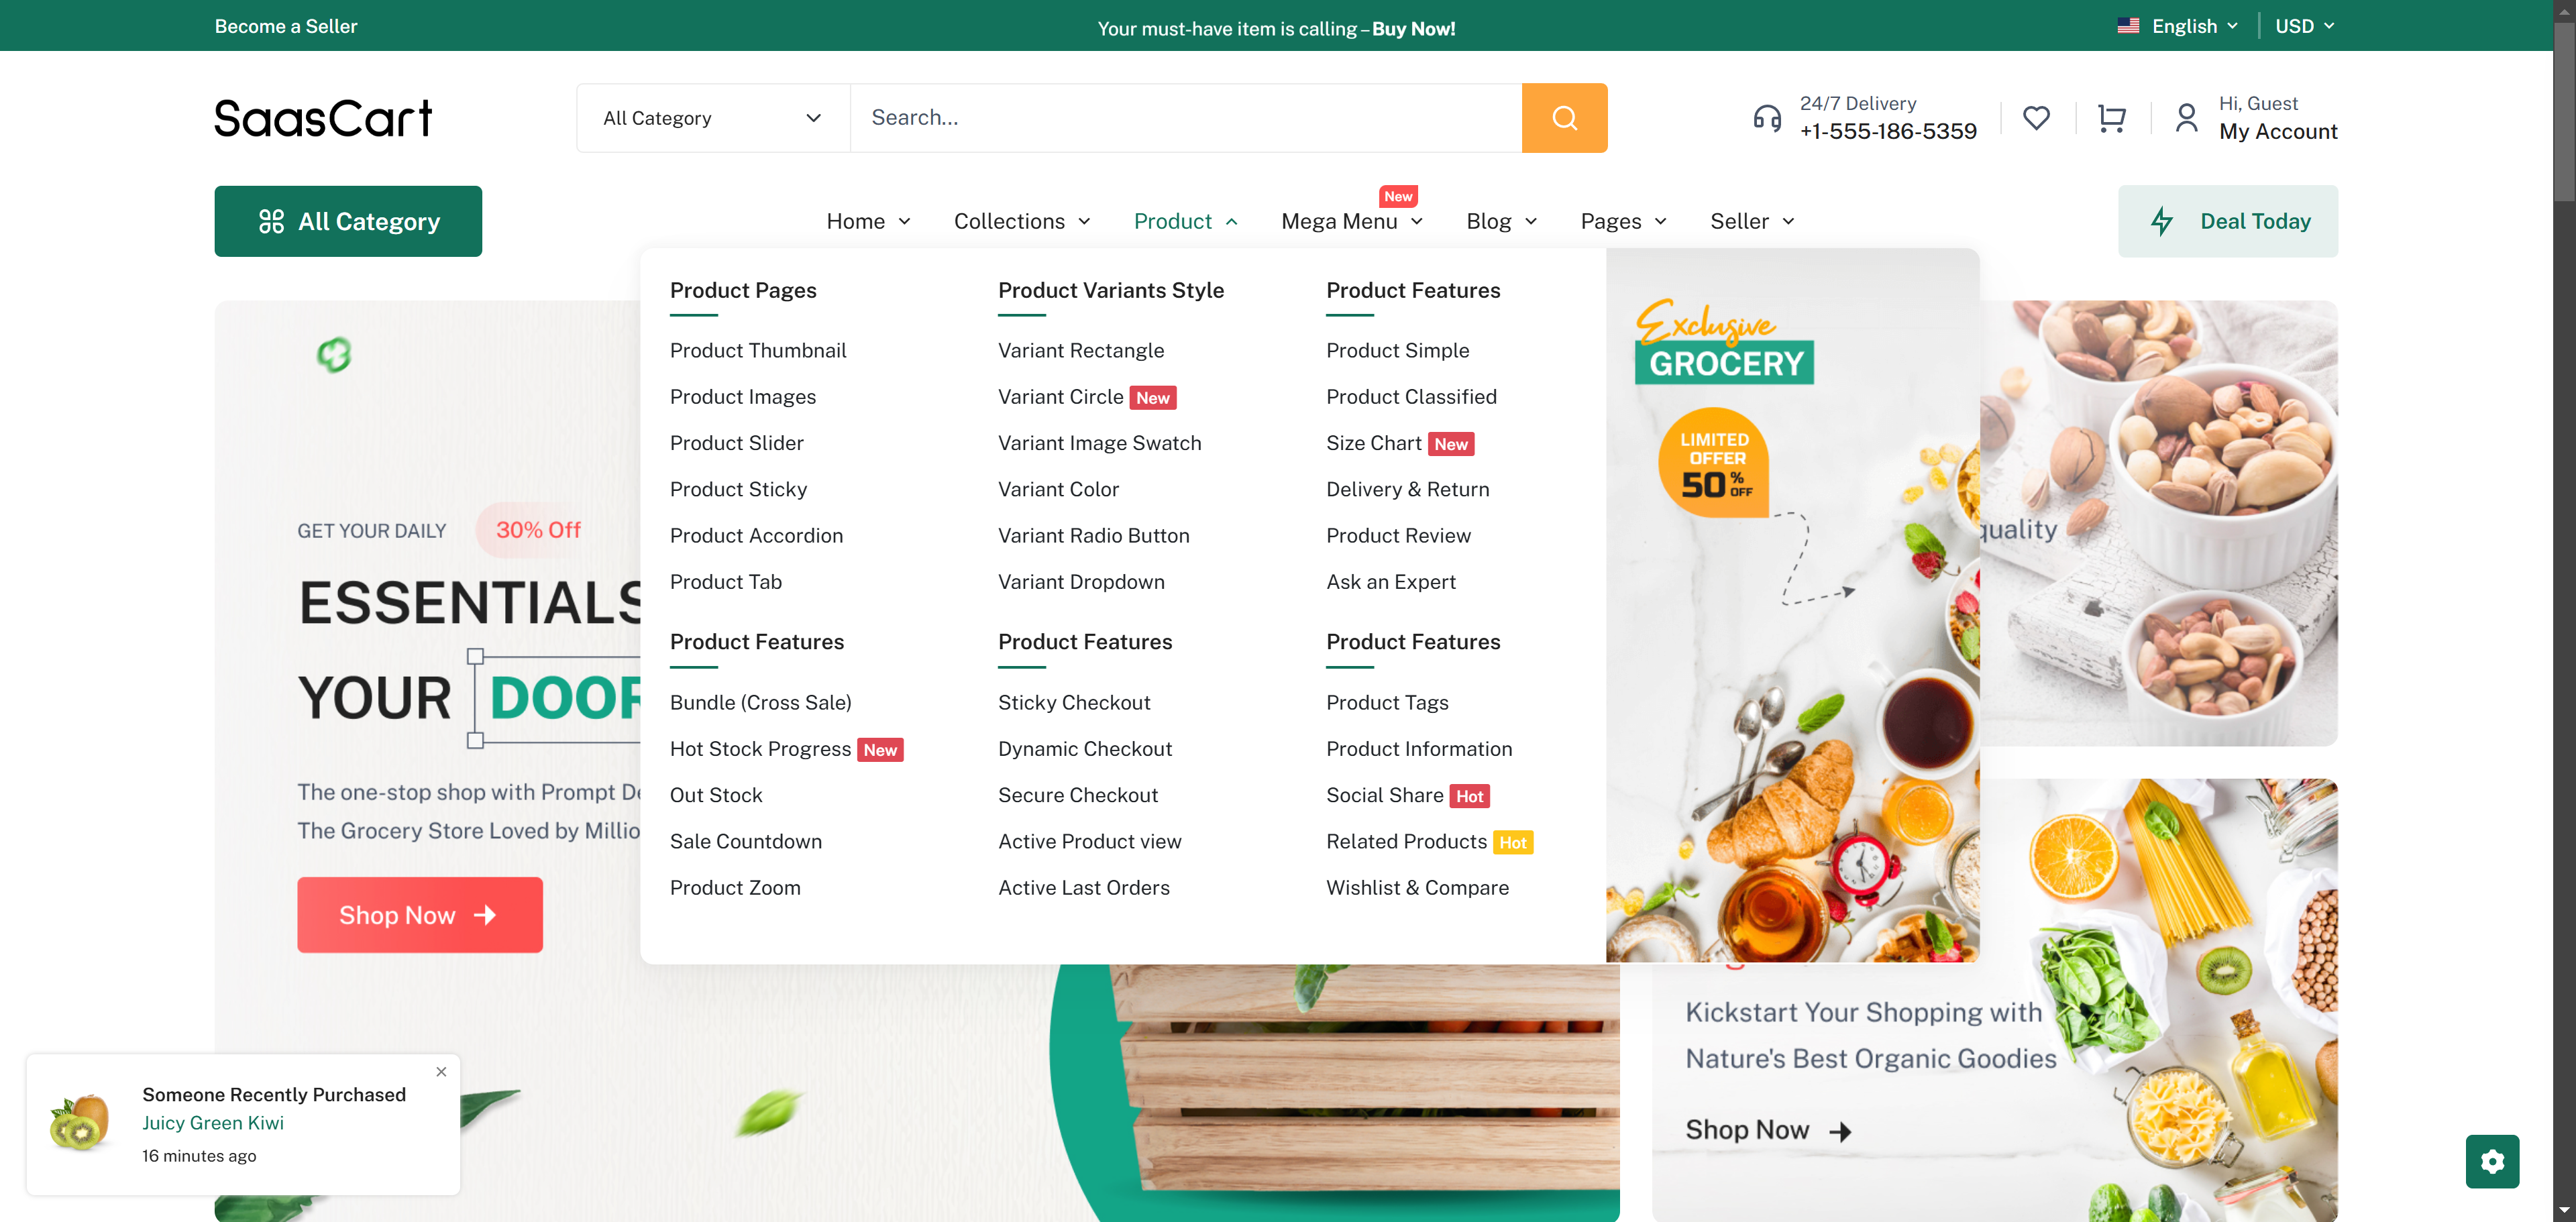
Mega Menu Configuration
The Mega Menu allows for a rich, multi-level navigation experience, enabling admins to add links, sub-links, and custom layouts.How to Create a Nav Menu
To add a new navigation menu, click Create and fill in the following details:- Title: Enter the title for the main link and any sub-links.
- Link Type: Select the link type from the dropdown:
- Sub: For sub-links.
- Link: For direct links.
Creating a Sub-Link
If you choose the Sub link type, you can activate the Mega Menu to design a more complex layout.- Mega Menu: Toggle this option on to enable Mega Menu design.
- Mega Menu Type: Select from six Mega Menu layout styles:
- Side Banner or Bottom Banner: If selected, a Banner field will appear for customization.
- Product Box: Enables a Product field for adding featured products.
- Blog Box: Enables a Blog field for adding recent blog posts.
- Link With Image: Adds an image field for each link.
Creating a Link
- Target Blank: Enable this to open the link in a new tab (for external links only).
- Set Page Link: Choose from existing pages or create a new page in the Page Module.
- Path: Enter the URL path for the link. External links will only open in a new tab if Target Blank is enabled.
Additional Options
- Select Parent: If creating a sub-link, select the parent menu item.
- Link Image: This field appears if you select the Link With Image Mega Menu type.
- Badge Text: Add a badge (e.g., New, Hot, Best Sale) to highlight the link.
- Badge Color: Select a color for the badge text.